How to Clean a Computer Mouse – Quick Guide
Did you know that 95% of computer mouse problems come from dirt and grime? Your mouse might be full of bacteria, making it less efficient.
If you love tech, you know how important it is to keep your mouse clean. It doesn’t matter if you’re a gamer, professional, or just use it for fun. A clean mouse is key for the best performance and to stay healthy.
Cleaning your mouse is more than just making it look good. It keeps the device that connects you to the digital world working well. This guide will show you how to make your mouse look new again, no matter if it’s optical or wireless.
Key Takeaways
- Regular cleaning prevents 95% of mouse performance issues
- Use soft tools to avoid damaging sensitive components
- Avoid alcohol-based cleaners that can corrode mouse surfaces
- Clean your mouse at least once a month
- Never disassemble your mouse to maintain warranty
Why It’s Important to Clean My Mouse
My computer mouse is more than just a simple device. It’s a breeding ground for bacteria and key to my computer’s health. Did you know your mouse can have more germs than a toilet seat?
Keeping my mouse clean is vital for many reasons. Office mice collect countless germs daily, posing sehttps://darrelaffiliate.com/wp-content/uploads/2024/12/vintage-electrical-and-electronic-appliances-in-an-2023-11-27-05-10-10-utc-e1734923695564.jpgus health risks.
Health Benefits of a Clean Mouse
Regularly cleaning my mouse stops harmful germs from spreading. Studies show office mice are among the dirtiest surfaces. The risks include:
- Reducing bacterial transmission
- Minimizing the risk of illness
- Creating a healthier workspace
Enhancing Mouse Performance
Proper care extends my mouse’s life. Dust, food, and oils can harm its function. Cleaning regularly ensures:
- Smooth cursor movement
- Accurate sensor performance
- Consistent button responsiveness
Prolonging Mouse Lifespan
A well-cared-for mouse lasts longer than one that’s ignored. Spending a few minutes on cleaning can add months or years to its life.
“A clean mouse is a happy mouse – and a happy computer user!” – Tech Maintenance Expert
For effective mouse care, clean it monthly, wash hands before use, and avoid eating near your computer. These simple steps keep your mouse performing well and clean.
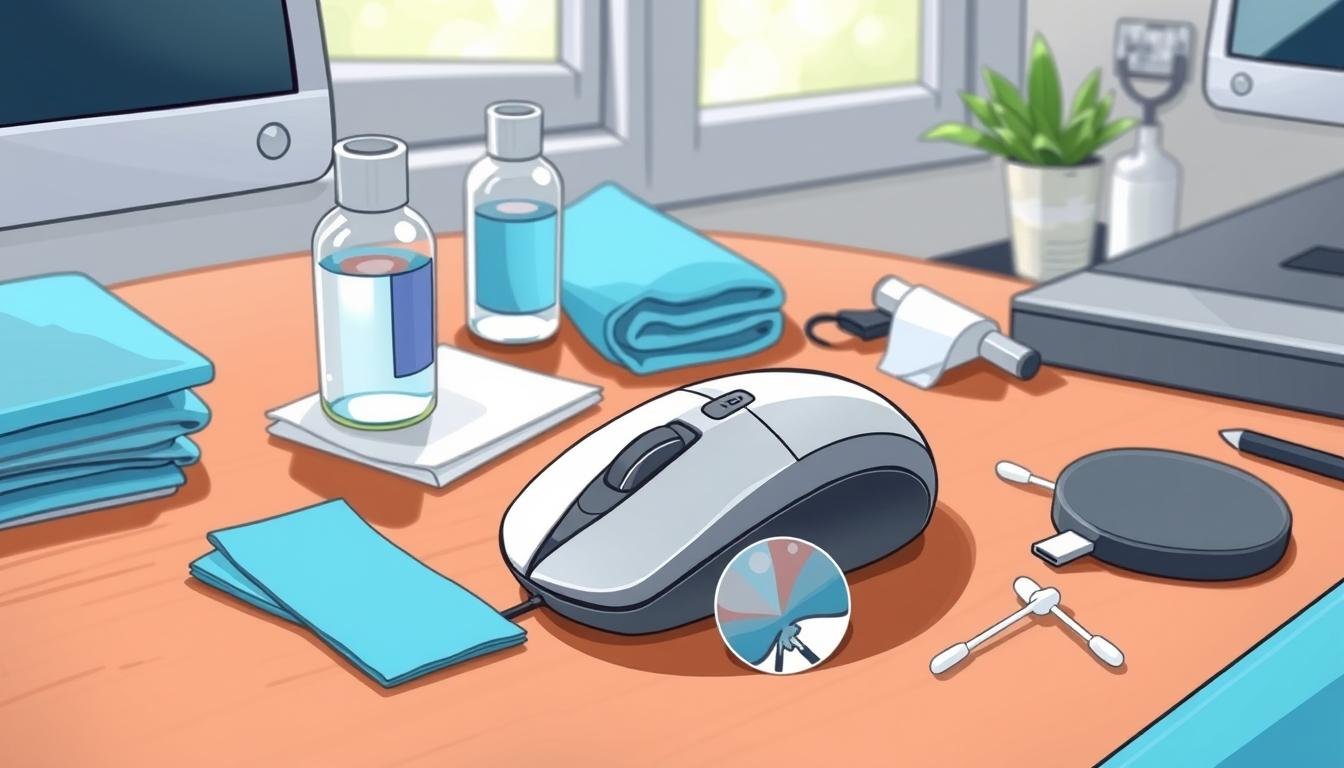
Tools I Need for Cleaning My Mouse
To keep my computer mouse clean, I need the right tools. I’ll show you the essential items for keeping my mouse in great shape.
Before I start cleaning, I gather specific supplies. These tools protect my mouse and remove dirt and grime well. I make sure I have everything before I begin.
Recommended Cleaning Supplies
- Lint-free microfiber cloth
- Cotton swabs
- 70% isopropyl alcohol
- Compressed air can
- Soft-bristled brush
These tools are key for my mouse’s performance. A good mouse cleaning guide suggests using safe, gentle materials.
Optional Tools for Deep Cleaning
| Tool | Purpose |
|---|---|
| Small screwdriver | Disassembly for thorough cleaning |
| Tweezers | Removing stubborn debris |
| Toothpicks | Precision cleaning in tight spaces |
Pro tip: Always avoid cleaning agents with ammonia, as they can damage electronic surfaces.
“Clean tools mean a clean mouse, and a clean mouse means better performance!”
Investing in the right mouse cleaning tools helps my mouse last longer. It also ensures it works smoothly every time I use it.
Preparing My Mouse for Cleaning
Before we start cleaning, it’s important to disconnect and prepare your mouse. This step keeps your device and computer safe. It also makes sure the cleaning goes smoothly without any damage.
When cleaning your mouse, the steps vary based on whether it’s wired or wireless. Wireless mice need extra care to avoid electrical problems.
Disconnecting Wired Mice
For wired mice, disconnecting is easy. Here’s what to do:
- Unplug the mouse from the USB port or computer connection
- Gently remove the cable to avoid strain
- Place the mouse on a clean, soft surface
Handling Wireless Mouse Preparation
Wireless mice need more care when cleaning. Make sure to:
- Remove batteries completely
- Separate the battery compartment from the main mouse body
- Ensure the workspace is dry and clean
Pro tip: Always disconnect electronic devices before cleaning to prevent potential short circuits or damage.
| Mouse Type | Disconnection Method | Preparation Steps |
|---|---|---|
| Wired Mouse | Unplug from USB | Ensure cable is undamaged |
| Wireless Mouse | Remove batteries | Check battery compartment |
Remember, careful mouse disconnection and preparation are key to maintaining your device’s performance and longevity.
Cleaning the Extehttps://darrelaffiliate.com/wp-content/uploads/2024/12/vintage-electrical-and-electronic-appliances-in-an-2023-11-27-05-10-10-utc-e1734923695564.jpgr of My Mouse
Keeping my computer mouse clean is key for its performance and to stop germs from spreading. Cleaning the mouse surface is simple but needs careful attention.

Different mice need different cleaning methods. Whether it’s an optical, gaming, or wireless mouse, the cleaning basics are the same.
Preparing to Wipe Down Surfaces
First, I’ll get my cleaning tools ready:
- Microfiber cloth
- 70% isopropyl alcohol solution
- Cotton swabs
- Lint-free soft cloth
Step-by-Step Surface Cleaning
- Unplug or remove batteries from the mouse
- Use a dry cloth to remove loose dust and debris
- Slightly dampen a cloth with isopropyl alcohol
- Gently wipe all extehttps://darrelaffiliate.com/wp-content/uploads/2024/12/vintage-electrical-and-electronic-appliances-in-an-2023-11-27-05-10-10-utc-e1734923695564.jpgr surfaces
- Use cotton swabs for hard-to-reach areas
“A clean mouse is a happy mouse – and a healthier workspace!”
When cleaning, I’m always gentle. Too much liquid can harm sensitive parts. I make sure my cloth is just damp, not wet.
Disinfection Tips
I focus on high-touch spots like buttons and the scroll wheel for thorough cleaning. A 70% isopropyl alcohol solution is best for killing germs without damaging my mouse.
How to Clean the Mouse Buttons
Keeping your computer mouse buttons clean is key for good performance and hygiene. Since mice can have 1,600 bacteria per square inch, cleaning them often is vital. It’s good for your health and keeps your mouse working well.
There are many ways to clean mouse grime effectively. The best method depends on the dirt and your mouse’s design.
Removing Dirt from Click Areas
To clean mouse buttons well, try these steps:
- Start with a soft, lint-free microfiber cloth for the surface
- Use cotton swabs for detailed cleaning around button edges
- Blow out loose debris with compressed air
- Choose 70% isopropyl alcohol for disinfecting
Tricks for Stubborn Grime
For tough grime, you need a more focused approach. A damp cotton swab with isopropyl alcohol can break down hard dirt. This method avoids moisture damage.
“A clean mouse is a responsive mouse” – Tech Maintenance Experts
How often you clean matters. I recommend a quick weekly clean and a deeper clean once a month. This stops dirt from building up too much.
| Cleaning Method | Effectiveness | Recommended Frequency |
|---|---|---|
| Microfiber Cloth Wipe | Good for daily maintenance | Weekly |
| Isopropyl Alcohol Cleaning | Excellent for deep sanitization | Monthly |
| Compressed Air | Best for removing loose particles | Bi-weekly |
Pro tip: Always disconnect your mouse before cleaning and let all surfaces dry before reconnecting.
Cleaning the Mouse Sensor
Keeping your mouse sensor clean is key for top-notch performance. Dust and dirt can mess up your mouse’s tracking, leading to jerky movements and less accuracy.
Let’s go over the important steps for cleaning your optical mouse sensor. This will help get your mouse working like new again.
Locating the Sensor
The first step is to find the sensor. It’s usually on the mouse’s bottom, looking like a small lens or light spot. Most optical mice have a red or green light when it’s on.
- Check the underside of the mouse
- Look for a small lens near the front button region
- Identify the light or lens area
Proper Sensor Cleaning Techniques
Cleaning the sensor needs to be done carefully to avoid damage. It’s best to use special tools for the job.
| Cleaning Tool | Recommended Usage |
|---|---|
| Compressed Air | Blow away loose dust particles |
| Cotton Swab | Gentle cleaning around sensor edges |
| Microfiber Cloth | Light surface cleaning |
| Isopropyl Alcohol (70%) | Moistened swab for thorough cleaning |
Remember these important tips when cleaning:
- Never apply direct liquid to the sensor
- Use light, gentle motions
- Allow the mouse to dry completely before reconnecting
- Test mouse functionality after cleaning
Pro tip: Regular sensor maintenance can extend your mouse’s lifespan and ensure consistent tracking performance.
Spending just a few minutes on cleaning your optical mouse sensor can greatly improve its tracking. This will also make your computing experience better.
Removing and Cleaning Mouse Feet
Mouse feet are key to your device’s smooth performance. I learned that keeping them clean greatly improves your mouse experience.
It’s important to know how mouse feet work for the best device performance. PTFE (Polytetrafluoroethylene) is used in mouse skates. It’s known for being very low-friction.
Why Mouse Feet Matter
- Ensure smooth cursor movement
- Reduce friction during computer use
- Protect the mouse base from direct surface contact
Safe Removal Techniques
Here’s how to clean mouse feet safely:
- Use a plastic card or specialized removal tool
- Gently pry the edges of the mouse feet
- Clean the exposed surface with 70% isopropyl alcohol
- Inspect for wear or damage
“Proper mouse feet maintenance can extend your mouse’s performance and lifespan.” – Tech Experts
When to replace mouse skates? Look for thinning, poor glide, or uneven movement. Cleaning them every few weeks helps avoid wear and keeps your mouse working well.
Clean mouse feet mean better cursor control. This is crucial for gaming and detailed design. Take good care of your mouse feet for a better computing experience.
Dealing with Sticky or Unresponsive Mice
Sticky mouse buttons can really get in the way of your work. It’s a common problem that can make your mouse less responsive. But, with the right steps, you can get your mouse working like new again.

Dirty or worn-out mice often cause these issues. Cleaning your mouse regularly can help avoid these problems.
Assessing the Problem
First, I check how bad the sticky mouse buttons are. Here are some signs to look for:
- Buttons feel physically sticky when clicked
- Inconsistent response during clicking
- Visible grime or residue around button areas
Cleaning Solutions for Sticky Buttons
For small sticky button problems, I try these steps:
- Power off or unplug the mouse
- Use isopropyl alcohol on a cotton swab
- Gently clean around and under the buttons
- Allow the mouse to dry completely
Pro tip: Avoid excess liquid that might damage internal components.
| Cleaning Method | Effectiveness | Risk Level |
|---|---|---|
| Cotton Swab + Alcohol | High | Low |
| Compressed Air | Medium | Very Low |
| Professional Disassembly | Very High | High |
Remember, prevention is always better than cure when it comes to fixing sticky mouse buttons and maintaining mouse responsiveness.
Maintenance Tips for a Clean Mouse
To keep my computer mouse in great shape, I follow a simple maintenance routine. This routine helps prevent dirt from building up. A clean mouse not only looks good but also works better, making navigation smooth and lasting longer.
I’ve found a way to keep my mouse clean and working well. The secret is being consistent and using the right methods.
Creating a Regular Cleaning Schedule
My mouse maintenance plan includes different cleaning steps:
- Quick daily wipe-down with a lint-free cloth
- Weekly light cleaning using compressed air
- Monthly deep cleaning for thorough dirt removal
Best Practices for Everyday Use
To stop dirt from building up, I use my mouse wisely. I always wash my hands before using it and avoid eating near my desk. When not in use, I keep my mouse in a clean, dust-free spot.
A clean mouse is a happy mouse!
For those with special mice like gaming or vertical designs, extra care is needed. These mice have detailed surfaces that can catch dirt more easily.
Essential Maintenance Tips
- Use compressed air to remove loose debris
- Clean sensors with a microfiber cloth
- Inspect mouse feet for wear and tear
- Store in a protective case when traveling
Remember, a little prevention goes a long way in extending your mouse’s lifespan!
Troubleshooting Post-Cleaning Issues
After cleaning your mouse, you might face some unexpected problems. Dealing with mouse issues can be tough, but I’m here to help. I’ll show you how to find and fix common problems after cleaning.
When your mouse acts up after cleaning, follow these steps to find the cause:
- Make sure all parts are dry
- Check that all connections are tight
- Look for any damage from cleaning
- Try different USB ports or ways to connect
Diagnosing Persistent Mouse Problems
Many post-cleaning issues come from a few main reasons. First, check your mouse’s physical state and how it connects. For wired mice, make sure the cable isn’t damaged. If you have a wireless mouse, check the battery and signal strength.
“A clean mouse is a happy mouse, but only if cleaned correctly!”
Resolving Unexpected Performance Issues
If your mouse still doesn’t work right, try these steps:
- Restart your computer to refresh mouse drivers
- Update your mouse’s software and drivers
- Look for any damage inside the mouse
- Try using the mouse on another computer
Pro tip: Sometimes, you need a pro to fix your mouse. If problems keep coming back, reach out to the maker.
Remember, cleaning your mouse right is key. But, being gentle is just as important. If you’ve cleaned it right and still have issues, it might be time for a new one.
Eco-Friendly Cleaning Alternatives
Green computer maintenance is more than a trend. It’s a way to keep devices clean and protect the environment. I’ve found some great, sustainable ways to clean my mouse that are good for both my computer and the planet.
Old cleaning methods use harsh chemicals that are bad for the environment. But, I’ve found natural alternatives that work just as well:
- White vinegar diluted with water
- Microfiber cloths for reusable cleaning
- Biodegradable cleaning wipes
- Plant-based cleaning solutions
Natural Cleaning Solutions I Can Use
I love using a mix of white vinegar and distilled water to clean. It gets rid of dirt and bacteria without harming the environment. Microfiber cloths are also a big help. They can be washed and used again and again, cutting down on waste.
| Cleaning Solution | Effectiveness | Environmental Impact |
|---|---|---|
| White Vinegar Mix | High | Low waste |
| Microfiber Cloth | Moderate | Reusable |
| Biodegradable Wipes | Good | Minimal environmental footprint |
Disposal Tips for Used Supplies
It’s important to dispose of cleaning supplies properly. I look for local e-waste recycling programs for electronics and cleaning stuff. Here are some tips for disposal:
- Keep electronic waste separate from regular trash
- Check what local recycling centers accept
- Look for manufacturer take-back programs
- Don’t throw electronics in the regular garbage
“Every small step towards eco-friendly cleaning makes a significant difference in reducing electronic waste.” – Environmental Technology Expert
By using these eco-friendly cleaning methods, I’m not just keeping my computer in good shape. I’m also helping make the future more sustainable.
Knowing When to Replace My Mouse
As a tech user, I’ve learned it’s key to know when to replace your mouse. A traditional mouse usually lasts about four years. But, there are signs that might mean you need a new one sooner.
Sporadic cursor jumps, broken buttons, or frequent disconnections can really mess up your work. These issues can slow you down a lot.
When your device starts showing consistent problems, it’s time to think about a new mouse. Sudden clicking failures or a cursor that freezes are big warnings. If your mouse has random cursor movements or sensor issues, it’s probably time for a new one.
When picking a new mouse, think about more than just basic features. Look for ergonomic designs, top-notch sensors, and make sure it works with your system. Brands like Logitech, Microsoft, and Razer are great choices. Check out user reviews and make sure the mouse fits your needs, whether for work, gaming, or everyday use.
My last piece of advice is to keep an eye on your mouse’s performance. If you see tracking problems or wear on buttons and feet, it’s time for a new one. A good mouse is key for staying productive and comfortable in our digital world.
Signs That It’s Time for a New One
Watch for these signs that your mouse needs to be replaced:
• Inconsistent cursor movement
• Unresponsive or sticky buttons
• Frequent disconnection problems
• Physical damage to the mouse
• Performance that gets worse over time
Choosing the Right Replacement Mouse
When looking for a new mouse, focus on:
• Ergonomic design
• Sensor quality
• Compatibility with your computer
• User reviews and brand reputation
• What you’ll use it for (work, gaming, design)